While not a drastic change-up, the new OneNote 2016 brings about a few cool new features. However, for many seasoned OneNote users, the 2016 version might also bring with it some initial frustration. If you were a regular user of the old Send to OneNote Tool, you may have had a panic moment upon taking your new 2016 version of OneNote for a test drive after installation. That's because Microsoft did away with it. Poof. Gone without a trace.
Some were annoyed with the presence of this tool, while others were avid users of it. For Office 2016, Microsoft axed the tool's presence and irked a decent number of OneNote faithfuls. (Including me.)
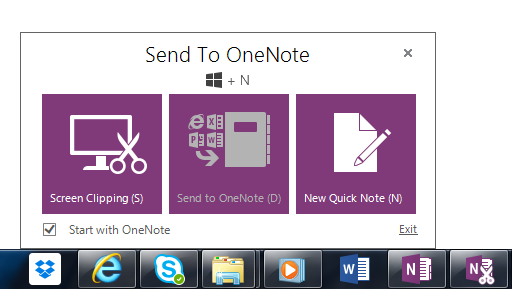
I used the handy tool faithfully. It offered three functions, as pictured above, but the only one I really ever used was the Screen Clipping feature. The old setup was a smooth part of my regular OneNote workflow, and a feature I used almost daily at work. Yes, there are other ways to snag a select portion of the screen, but none I tried worked as smoothly and efficiently as the Screen Clipping option in the old Send To OneNote Tool. During a moment of initial panic, I considered uninstalling Office 2016 and reverting back to the 2013 version.
If you have found yourself in a similar mindset, lose the panic. I'll show you the quick and easy way to get that old familiar Screen Clipping function back in your OneNote 2016 experience.
If you have found yourself in a similar mindset, lose the panic. I'll show you the quick and easy way to get that old familiar Screen Clipping function back in your OneNote 2016 experience.
Keyboard Shortcut
Screen Clipping was never my thing to use the keyboard shortcut to access. Since you use the mouse to select and clip, it isn't efficient to go from mouse to keyboard and back to mouse. Anyway, in 2013, you could hold the Windows key + S to execute Screen Clipping. In 2016...nope.
Not to fear, the keyboard shortcut is still there, it is just different. Now, you press Windows key + Shift + S to execute the Screen Clipping function.
Not to fear, the keyboard shortcut is still there, it is just different. Now, you press Windows key + Shift + S to execute the Screen Clipping function.
Taskbar Icon
A keyboard shortcut is better than nothing, but what if you're using a tablet and don't have a keyboard/type cover connected? Or, what if you just can't live without an icon to click on? Well, the following instructions should make you a very happy OneNoter once again...
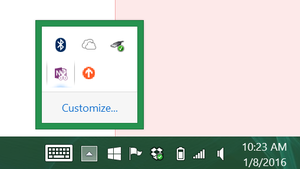
STEP 1:
Click on the little up-triangle on your system tray that's located on the far right side of your taskbar. In the little hidden icons box that appears, you should see a little clipper tool icon. Simply drag and drop it from inside the box onto the system tray side of the taskbar. (Sorry--you can't place it elsewhere.)

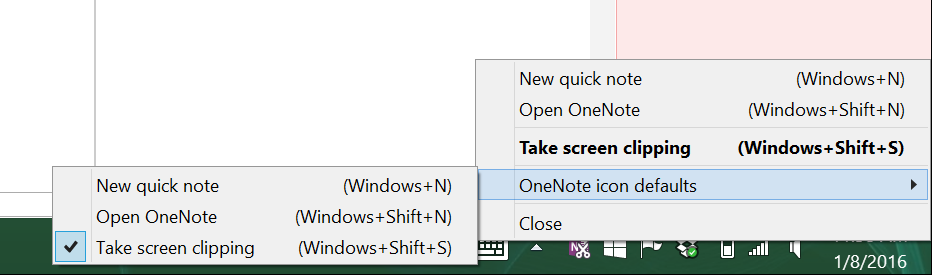
STEP 2:
Now, right click on the little Clipper icon that you just moved. You will given three option to choose from that will assign an action to the icon, one of which is "Take screen clipping". Choose that option, and you should be all set.
Now, right click on the little Clipper icon that you just moved. You will given three option to choose from that will assign an action to the icon, one of which is "Take screen clipping". Choose that option, and you should be all set.
Now, whenever you click on this icon, it will execute the Screen Clipping function that you are used to. (Insert applause here.) It may take a little getting used to having the icon on the right side of your taskbar, but after a few days, I found that I actually like this option better, as it is one less click. Yes, you can do this for OneNote 2013, if you have other computers you use that aren't on 2016 yet and you want to preserve the interface along machines. (My work is still 2013.)
As always, if I have incomplete or incorrect information, please let me know. I'm not a OneNote expert, but rather just a fan.

 RSS Feed
